
TL;DR
Acoustic dampening isn’t the same as soundproofing. To keep noise out and sound quality high, focus on placement, strategic absorption, and ventilation. A closet can be a budget-friendly, effective studio with the right tweaks.
Ever tried recording vocals in a tiny closet? It sounds surprisingly good—if you do it right. The secret isn’t just slapping foam on the walls; it’s about smart placement, dampening echoes, and making sure your space breathes. You’ll learn how to turn that cramped closet into a quiet, effective studio without breaking the bank.
This guide cuts through the noise—literally—to show you how to make your space sound better, block out outside sound, and keep your gear cool. Whether you’re working on podcasts, singing, or just want a quick vocal booth, these tips will help you get professional results in a tiny space. For more tips, visit all-waterparks.com.
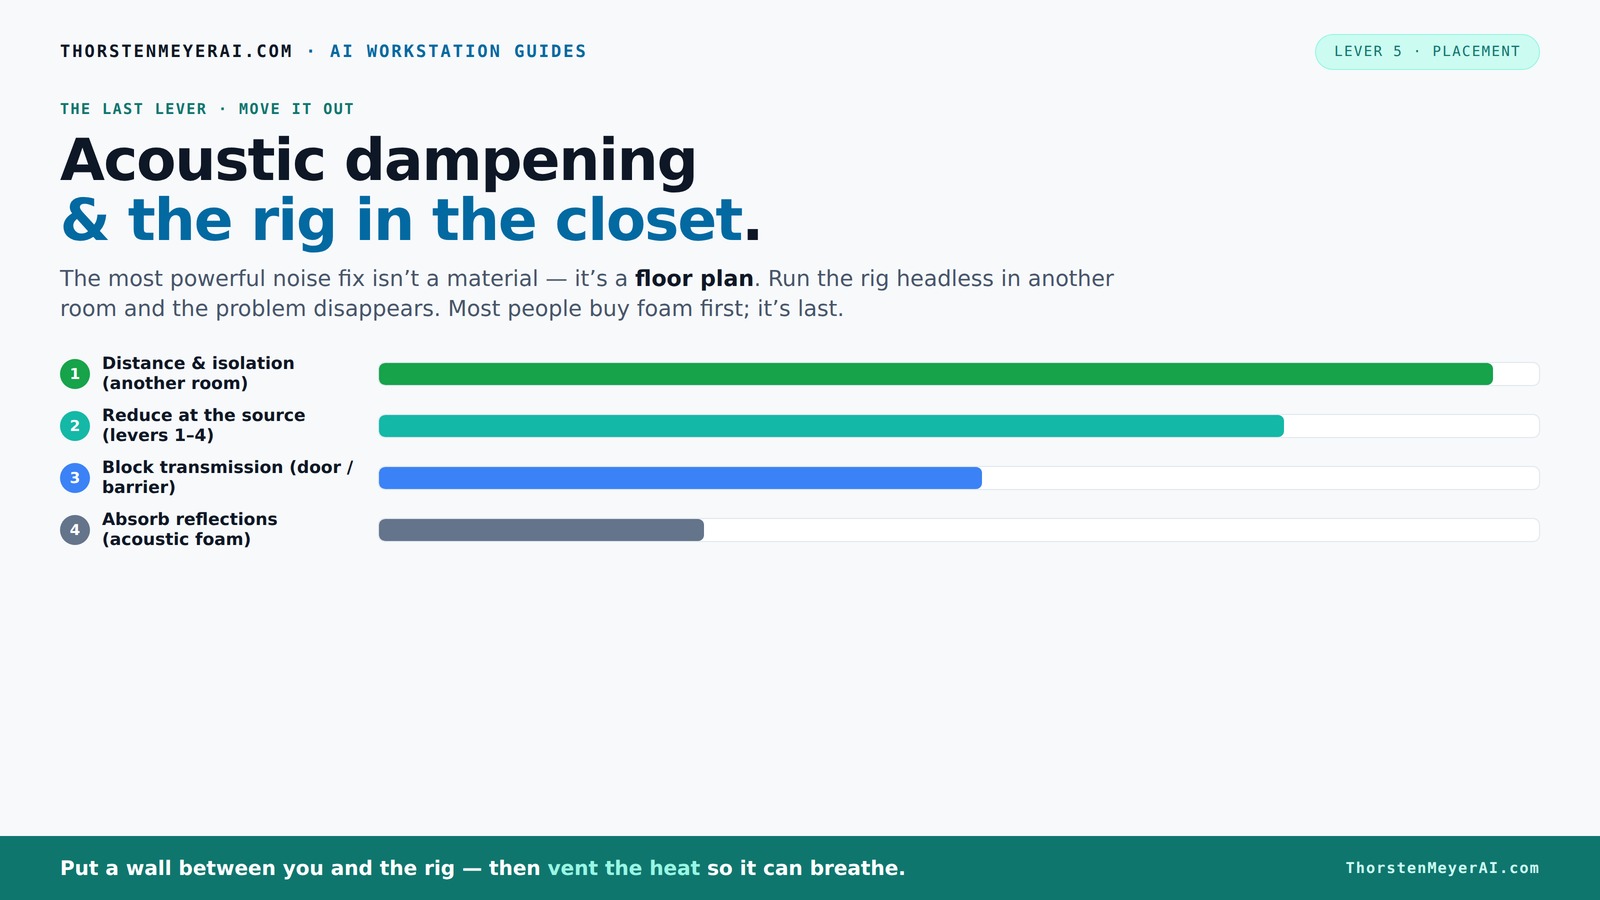
Acoustic dampening
& the rig in the closet.
The most powerful noise fix isn’t a material — it’s a floor plan. A rig you can’t hear because it’s in another room beats any amount of foam. Tap the approaches in Part 1 to see what actually works.
(another room)
(levers 1–4)
(door / barrier)
(acoustic foam)
Contain the noise, not the heat
Key Takeaways
- Focus on placement first: reflection points and mic positioning are key to sound quality.
- Use bass traps in corners to control low-frequency rumble common in small closets.
- Don’t over-treat—target about 20-40% coverage with foam for natural sound without deadness.
- Ventilation is critical—sealed closets trap heat, so ensure proper airflow with fans or vents.
- Moving blankets and simple seals can make a big difference on a budget, but aren’t a substitute for proper barriers.

24 Pack Black 12 x 12 x 2 Inches Pyramid Designed Acoustic Foam Panels, Sound Proof Foam Panels for Walls, High Density and Flame-Retardant Acoustic Panels, Sound Panels for Recording and Home Studio
Exceptional Sound Absorption:These pyramid acoustic panels are engineered to effectively absorb sound waves, reducing echo and reverberation. With...
As an affiliate, we earn on qualifying purchases.
As an affiliate, we earn on qualifying purchases.
Acoustic Dampening vs. Soundproofing: What’s the real difference?
Most people confuse dampening with soundproofing. Acoustic dampening is about reducing echoes and reflections inside a space—making the sound clearer and less boxy. Soundproofing, on the other hand, blocks sound from leaving or entering the room, which is a whole different game.
Understanding this distinction is crucial because it influences your choice of materials and setup. Dampening inside the closet improves clarity, making your recordings sound more professional by controlling internal reflections. But if outside noise leaks in or your sound escapes, you need additional barriers like sealing gaps or installing thick doors. The tradeoff is that dampening is generally easier and cheaper but doesn’t eliminate noise transfer. Combining both techniques—dampening for inside sound quality and soundproofing for isolation—gives you a more complete solution. Recognizing what each method achieves helps you prioritize your efforts and budget effectively, ensuring you don’t over-invest in unnecessary soundproofing when dampening suffices or vice versa.
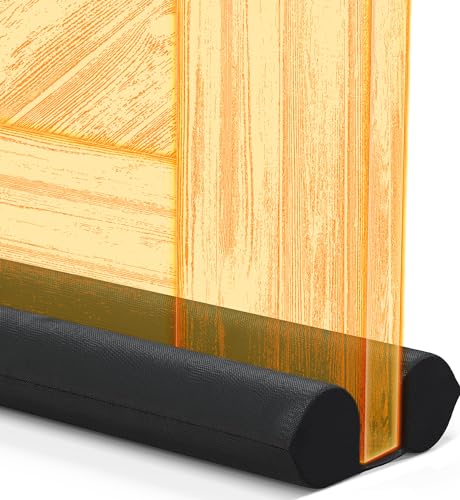
Everlasting Comfort 2 Sided Door Draft Stopper for Bottom of Door - Keeps Cold Air in & Heat Out, 100% Sound Proofing Strip Gap Filler, Quick Install Noise Blocker Sweep for Home - Fits 30"- 36" W
QUICK AND EASY INSTALL: Ideal for doors 30" to 36" wide. Install in a few easy steps -...
As an affiliate, we earn on qualifying purchases.
As an affiliate, we earn on qualifying purchases.
Where to place acoustic panels for the best sound inside your closet
To make your closet sound great, start with the reflection points. The first step is identifying where sound bounces around. Use a mirror at your mic position—any spot where you see the panel reflect your reflection is a prime placement.
Popular spots include:
- The wall behind your microphone
- Side walls at head level
- The ceiling directly above your head
Focusing panels on these reflection points is essential because these are the areas where sound waves bounce and create echoes. By absorbing these reflections, you reduce reverberation, which results in clearer recordings. This targeted approach prevents over-treating the space, which can make it sound unnatural or dead. Additionally, placing bass traps in the corners complements this by absorbing low frequencies that tend to build up and muddy the sound. Proper placement is about understanding how sound interacts with your space—think of it as tuning your environment to be as acoustically friendly as possible for your voice or instrument. The tradeoff here is balancing enough absorption to improve sound without making the room overly dull or unnatural, which can happen if panels are overused or placed indiscriminately.

Sound Addicted - Studio Monitor Isolation Pads suitable for 6.5, 7 and 8 Inches Large Speakers | Reduce Vibrations and Fits most Stands - Pair | SMPad 8
SMPad 8 is made out of the highest quality acoustical foam (50kg/m^3 density).
As an affiliate, we earn on qualifying purchases.
As an affiliate, we earn on qualifying purchases.
Do I need bass traps in a tiny closet? Yes, and here’s why
Bass traps aren’t just for big studios—they’re vital in small spaces too. In a closet, low frequencies tend to pile up in corners, creating a boomy, muddy sound. Installing bass traps in the corners can tame that buildup, leading to clearer, more accurate recordings.
Low frequencies have longer wavelengths, which means they require more space to dissipate naturally. In small rooms, these frequencies bounce around and accumulate in corners, causing a muddy or boomy sound that obscures your vocals or instruments. Bass traps absorb these low-end waves before they can cause issues, resulting in a more balanced frequency response. For example, a musician recording vocals in a closet noticed her recordings went from muddy to clear after adding bass traps in the two most accessible corners. This small investment in corner treatment has a disproportionately positive effect because it addresses the root cause of low-frequency buildup. Ignoring bass trapping in small spaces often leads to recordings that sound boomy or muffled, regardless of other treatments. The tradeoff is that bass traps can be a bit more costly and require careful placement, but the payoff in sound quality is well worth it—especially when every nuance of your voice or instrument matters.

VEVOR Portable Vocal Booth, 6.56 ft Height, Portable Recording Studio with Travel Bag, Mobile Tablet Stand, Thickened Soundproofing, Sound Isolation Booth for Echo-Free Vocals, Podcasts, Voiceovers
Say Goodbye to Echoes: Built with durable Oxford cloth and acoustic padding, this recording booth for the home...
As an affiliate, we earn on qualifying purchases.
As an affiliate, we earn on qualifying purchases.
Should I put foam on all walls? Not necessarily—here’s what works best
Covering every wall in foam is tempting, but it’s often unnecessary and can even make your room sound worse. The goal is targeted absorption—placing foam where sound reflects most, not covering every surface indiscriminately.
In a small closet, roughly 20-40% coverage on side walls and behind the mic is enough. Focus on the reflection points identified through the mirror trick, the ceiling, and the corners where low frequencies tend to gather. Learn more about acoustic placement. Over-treating can deaden the sound excessively, making recordings feel unnatural and flat. It’s better to strategically place panels where they’re most needed, allowing some natural room resonance that keeps the sound lively yet controlled. For example, a podcaster found that just adding foam panels to the side walls and ceiling improved clarity without making his closet sound dull or lifeless. This balanced approach preserves some of the room’s natural warmth while reducing harsh echoes, demonstrating that targeted treatment is more effective than blanket coverage. The tradeoff involves understanding your space's unique acoustic profile and avoiding overcorrection, which can lead to a sterile sound.
Frequently Asked Questions
Is acoustic dampening the same as soundproofing?
No. Acoustic dampening reduces echoes and reflections inside a space, making sound clearer. Soundproofing blocks sound from entering or leaving, requiring barriers, seals, and heavy doors.Where should acoustic panels go in a closet studio?
Place panels at reflection points—behind the mic, side walls at ear level, and the ceiling above. Use mirror trick to find these spots if needed.Do I need bass traps in a closet?
Absolutely. Bass traps in corners help control low-frequency buildup, preventing recordings from sounding muddy or boomy.Should I put foam on all walls?
Not necessarily. Focus on key reflection points—covering 20-40% of the surfaces usually suffices without deadening the room.How do I stop sound from leaking through the closet door?
Seal gaps with weatherstripping, hang blankets or moving pads, and consider a soundproof door seal for best results.Conclusion
Your closet can become a surprisingly good studio with just a few strategic tweaks. Focus on placement, targeted dampening, and ventilation—then enjoy clear, professional-sounding recordings without spending a fortune.
Remember, the best studio is the one that fits your space and budget. With a little creativity, you’ve got everything you need to start making better recordings today.