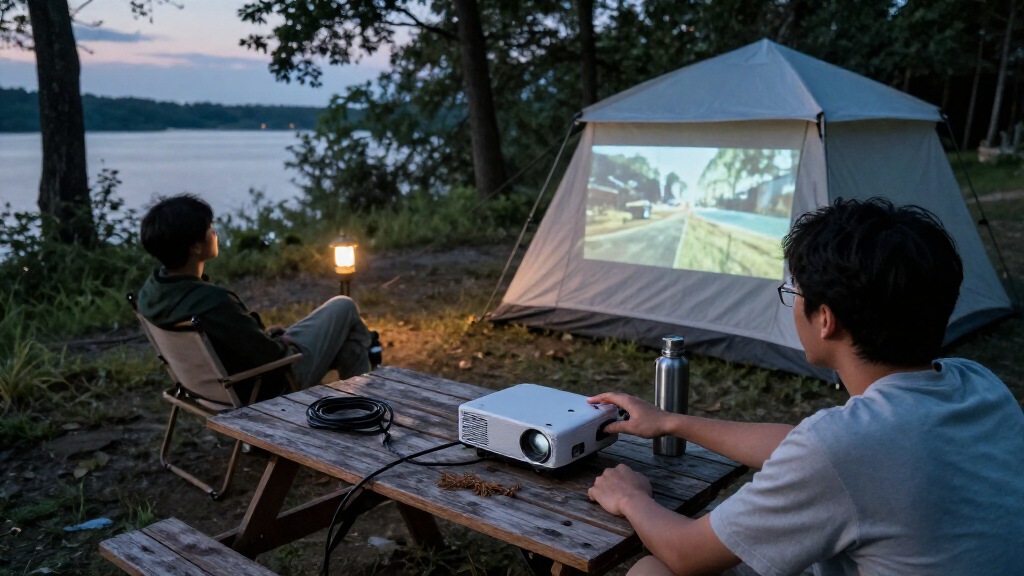
This guide helps you choose a portable projector for outdoor use, set it up safely, connect a video source, and check the picture and sound before your audience arrives. It is for beginners planning a backyard movie, presentation, or other temporary outdoor viewing session. Allow 45-90 minutes for your first setup, including a test in the light conditions you expect to use.

Get travel and outdoor gear delivered free with Prime
- Fast, free delivery on millions of items
- Prime Video, Amazon Music and more included
- Member-only deals all year

Aurzen Roku TV D1R Smart Portable Outdoor Projector with WiFi and Bluetooth
- ✔ Native resolution: 1920 x 1080
- ✔ Brightness: 300 ANSI lumens
- ✔ Image size: 40–200 inches

Aurzen D1R Air USB-C Powered Smart Portable Roku TV Projector
- ✔ Resolution: Native 1080p
- ✔ Brightness: 300 ANSI lumens
- ✔ Weight: 2.60 lb (1.18 kg)

HAPPRUN Native 1080P Bluetooth Projector – Standard
- ✔ Native resolution: 1920 x 1080
- ✔ Display type: LCD
- ✔ Brightness: 300 ANSI lumens
Outdoor results depend on more than the projector. Screen size, darkness, power, weather, and audio all affect what viewers see and hear. Follow the steps in order, and use the test projection to catch problems before the event.
Difficulty: Beginner | Time: 45-90 minutes for first setup; 10-20 minutes for later sessions
What You’ll Need
Tools & Materials:
- Portable projector with its power adapter or a compatible charged battery
- Projector screen or a smooth, taut, light-colored projection surface
- Video source, such as a laptop, streaming device, phone, or USB drive
- Compatible HDMI cable or wireless connection, plus any required phone adapter
- Speaker or projector audio system, if the built-in speaker is not adequate
- Stable table, tripod, or projector stand
- Outdoor-rated extension cord and weather-protected power connection if needed
- Measuring tape and a soft cloth for the lens
Knowledge:
- Basic ability to connect a video source by HDMI or use the projector’s wireless menu
- Ability to find the projector’s throw distance and supported resolution in its manual
Check the projector manual for throw distance, supported video formats, battery runtime, and any outdoor-use limits. Many portable projectors are not weatherproof. Keep the projector, source device, power adapter, and connections dry; use them only in conditions permitted by their manufacturers. Do not run household extension cords through puddles or where people can trip.
Aurzen Roku TV D1R Smart Portable Outdoor Projector with WiFi and Bluetooth
The Aurzen Roku TV D1R is the most complete choice for a simple outdoor movie setup. Built-in Roku streaming means we can access entertainment without adding a streaming stick, and auto focus plus keystone correction helps get the image into shape after moving the projector. That convenience matters outdoors, where the ideal placement may be a chair, side table, or temporary stand rather than a permanent mount.Compared with the D1R Air, this model is the more direct pick when built-in Roku is the priority and its stated 2.1 kg weight is acceptable. The HAPPRUN H1 offers more described mounting flexibility and Bluetooth 5.3, but requires a separate streaming source. The D1R’s 300 ANSI lumens still point us toward viewing after dark, and its fan may be noticeable in a quiet yard. Full Roku functionality also depends on an account and internet connection, so it is less appealing for remote spots without reliable Wi-Fi.
Pros:
- Built-in Roku streaming reduces the need for a separate streaming device.
- Auto focus and keystone correction simplify setup after repositioning.
- Native 1920 x 1080 resolution supports Full HD content.
- Dual 5W speakers and Bluetooth provide onboard and flexible audio options.
Cons:
- At 300 ANSI lumens, it is best reserved for dim or dark viewing.
- Full Roku functionality requires an account and internet connection.
- Fan noise can be noticeable in quiet environments.
Best for: Buyers who want integrated Roku streaming and automatic image adjustment for a backyard movie setup near dependable Wi-Fi.
Not ideal for: Those planning to watch before dark, camp without internet, or prioritize the lightest specified unit.
Bottom line: For most buyers with a dark viewing area and Wi-Fi, the D1R combines streaming and setup assistance more neatly than the other two picks.
“For most buyers with a dark viewing area and Wi-Fi, the D1R combines streaming and setup assistance more neatly than the other two picks.”
Aurzen D1R Air USB-C Powered Smart Portable Roku TV Projector
The Aurzen D1R Air puts portability and power flexibility at the center of the decision. At a stated 2.60 lb, it is the lightest option with a supplied weight, and its 65W+ USB-C PD input can suit a compatible charger or power bank. That can simplify packing for a trip, provided we confirm the power source meets the requirement before leaving home.Like the D1R, it includes Roku, auto focus, and auto keystone, so it is more self-contained than the HAPPRUN H1 for streaming and setup. Its dual 5W Dolby Audio speakers are described as part of a separate audio base, which may appeal when onboard sound matters. The tradeoff is the strict power condition: lower-power USB-C chargers will not operate it. Its 300 ANSI lumens also make it a dusk-or-later projector, not a solution for a bright campsite or early evening with lights on.
Pros:
- Specified weight of 2.60 lb supports a more portable kit.
- USB-C PD input allows use with compatible high-output power sources.
- Built-in Roku, TOF autofocus, and auto keystone reduce setup steps.
- Dual 5W Dolby Audio speakers provide onboard sound.
Cons:
- Requires a 65W+ USB-C PD source; lower-power chargers will not work.
- 300 ANSI lumens limits practical use to dim conditions.
- The stated power requirement makes an unverified power bank a poor plan.
Best for: Travelers who want a light Roku projector and already have access to a compatible 65W or higher USB-C PD source.
Not ideal for: Buyers who need power-bank compatibility without checking output, or who expect a bright image in ambient light.
Bottom line: Choose the D1R Air over the standard D1R when its lighter specified weight and USB-C power fit your travel kit, and only after confirming your power source.
“Choose the D1R Air over the standard D1R when its lighter specified weight and USB-C power fit your travel kit, and only after confirming your power source.”
HAPPRUN Native 1080P Bluetooth Projector – Standard
The HAPPRUN H1 suits buyers who want placement choices and straightforward connections more than an integrated smart TV platform. It supports desktop, tripod, or ceiling mounting, and its HDMI, USB, and 3.5mm inputs give us several ways to connect a playback device. Bluetooth 5.3 audio adds another option when the built-in stereo speakers are not enough for a larger gathering.Its native 1920 x 1080 resolution matches the Aurzen models, and the stated image range reaches 200 inches. But the H1 does not include the Roku streaming platform or the automatic focus and keystone features described for either Aurzen, so a separate source and more hands-on setup may be needed. Its 300 ANSI lumens are the same limiting factor across this lineup. This is a useful choice for someone who already owns a streaming device and values mounting flexibility; buyers seeking a quick, self-contained setup should look at the Roku models first.
Pros:
- Native Full HD resolution matches the Aurzen options.
- Desktop, tripod, and ceiling mounting support varied placement.
- Bluetooth 5.3 allows wireless audio connections.
- Built-in stereo speakers and HDMI, USB, and 3.5mm inputs support a flexible basic setup.
Cons:
- No built-in Roku streaming platform is specified, so a separate playback source may be needed.
- 300 ANSI lumens favors dark viewing conditions.
- Automatic focus and keystone correction are not listed in the supplied specifications.
Best for: People with an existing HDMI streaming source who want desktop, tripod, or ceiling placement and Bluetooth audio flexibility.
Not ideal for: Buyers who want built-in streaming or automatic focus and keystone adjustment, or who need strong performance with patio lights on.
Bottom line: The H1 makes the most sense when mounting choice and Bluetooth 5.3 matter more than Roku convenience and automatic setup.
“The H1 makes the most sense when mounting choice and Bluetooth 5.3 matter more than Roku convenience and automatic setup.”
As an Amazon Associate we earn from qualifying purchases.
Before You Start
Choose the viewing location and approximate screen size before selecting a projector. For outdoor viewing, a darker location usually matters more than a large advertised brightness number. If possible, schedule the main viewing after sunset, and avoid aiming toward streetlights or nearby windows. Check the forecast and have a dry indoor fallback if rain, strong wind, or dew is likely.
Read the throw-distance guidance for your projector before placing the screen. Models vary: some need several feet to produce a large image, while short-throw models can work closer. Check that your video source can provide a compatible signal and that any streaming service permits playback from the device you plan to use.
Step-by-Step Instructions
Step 1: Choose a projector and screen size
Choose a projector based on the setting, not just its portability. For a backyard, check its supported resolution, brightness information, input options, battery runtime if relevant, and recommended throw distance. For a group, select a screen size that viewers can see comfortably from their seats; a smaller, bright image often looks better outside than a very large, dim one. Choose a screen or surface that can stay smooth and stable.
Confirm that the projector has the connection your source needs. If using a phone, check whether you need a specific video adapter or whether the projector supports the phone’s wireless casting method. Do not assume that a USB port can play every video file; check supported formats in the manual.
Tip: Treat advertised brightness and battery runtime as model-specific claims, not guarantees of outdoor performance. Test the actual combination of projector, screen, and source before the event.
Check: You have a projector with a compatible input, a screen plan, and a location that can meet its throw-distance requirements.
Step 2: Inspect and prepare the location
Set up on firm, level ground with enough room for the screen, projector, and seating. Look for overhead branches, sprinklers, damp ground, strong wind, and paths people will use. Position the screen where viewers can face it without looking toward a bright light. Secure a freestanding screen according to its instructions, and do not rely on a loose sheet that can ripple or blow around.
Place the projector on a stable surface near a protected power source, or confirm that its battery has enough charge for the full program. Route cables along an edge and away from walkways. If a cable must cross a route, protect it with a suitable cable cover and make the crossing easy to see.
Tip: Do not leave a projector or its power supply outdoors unattended when rain or heavy dew is possible. Bring equipment inside if conditions change.
Check: The screen and projector can sit level, the viewing path is clear, and no cable creates an exposed trip hazard.
Step 3: Position the projector using its throw distance
Measure from the projector lens to the screen, then place the projector within the distance range listed in its manual for your intended image size. Aim the lens toward the center of the screen. Keep the projector level and centered where possible; this usually produces a better-shaped picture than pointing it sharply upward or sideways.
Turn on the projector and display a test image or menu. Adjust the projector’s position first to fill the screen and keep the image rectangular. Use keystone correction only to make small corrections if the projector cannot be repositioned. Digital correction can reduce image detail, so do not use it as a substitute for a stable, well-aimed setup.
Tip: Do not move the projector while its lens is being focused. Secure it before fine-tuning, especially if it is on a tripod or a narrow table.
Check: The image fits within the screen borders, appears close to rectangular, and the projector does not wobble.
Step 4: Connect the video source and audio
Turn off or pause playback, then connect the source to the projector with a compatible HDMI cable or select the correct wireless input. For a phone or tablet, use a video-capable adapter if connecting by cable; charging-only adapters will not send a picture. Choose the projector’s matching input in its source menu, then start a familiar video or display a test image.
Connect an external speaker if the built-in speaker is too quiet for the seating area. Use the projector’s audio output, Bluetooth, or a separate source connection supported by your equipment. Set speaker volume at a moderate level first, then adjust it while standing where viewers will sit. Wireless audio can have a delay; check that speech matches the picture.
Tip: Test streaming and downloaded content before guests arrive. Some services restrict casting, and a phone may stop playback if its screen locks or its battery runs low.
Check: The intended picture appears, audio comes from the expected speaker, and dialogue is synchronized.
Step 5: Focus and test the picture in viewing conditions
Wait until the light level is close to what it will be during the event. Display a scene with faces, text, and dark areas, then adjust focus until details look sharp across the center and edges. Set brightness or picture mode to a comfortable level, and check that the image is not washed out by ambient light. If it is too dim, wait for darker conditions, reduce the image size, or move the screen to a darker spot.
Check the image from several seats, not only from behind the projector. Confirm that the screen is visible without glare and that no object blocks the beam. Keep air vents clear and follow the manual’s instructions for ventilation and operating temperature.
Tip: A glossy wall, wrinkled fabric, or light-colored surface with texture can make the picture uneven. A taut, matte screen usually gives more consistent results.
Check: Text and faces are in focus, the image is visible from the planned seats, and no light source overwhelms it.
Step 6: Run a full-length readiness check
Play the source for at least 10 minutes with the projector, audio, and power arrangement you will use. Confirm that the battery or power source is holding, the projector stays stable, and the source does not disconnect or enter sleep mode. Check that the audio is clear at the farthest seat and that cables remain out of walking paths.
Set a remote control or source device where you can reach it, and identify how to pause or shut down the projector. If the projector uses a lamp that needs a cool-down cycle, use its power button and wait for the fan or status light to indicate shutdown before unplugging it.
Tip: Keep drinks and food away from the projector and its connections. A spill can damage equipment or create an electrical hazard.
Check: The test runs without signal drops, overheating warnings, power interruptions, or distracting audio problems.
Common Mistakes to Avoid
- Setting up while the sky is still too bright and expecting the projector to overcome daylight. — Schedule the main viewing after sunset, choose a shaded location, or reduce the projected image size. Test at the light level expected during the event.
- Placing the projector at an arbitrary distance and correcting a badly angled image with keystone controls. — Use the manual’s throw-distance guidance, aim toward the screen center, and move the projector until the image is close to rectangular before applying minor correction.
- Assuming the projector, cables, or power connections can tolerate rain or dew. — Check the manufacturer’s limits, keep equipment dry, and cancel or move the setup indoors if weather threatens the gear.
- Relying on built-in speakers without checking them from the audience area. — Test sound from the farthest seat and connect an external speaker when speech is not clear throughout the seating area.
Troubleshooting
Problem: The projector shows a blank screen or says there is no signal.
Solution: Select the input matching the connected port, reseat the cable at both ends, and confirm that the source is awake and outputting video. If using a phone, verify that its adapter supports video output. Try a different cable or source to isolate the fault.
Problem: The image looks dim or washed out.
Solution: Wait for darker conditions, turn off nearby lights, move the screen away from stray light, or reduce the image size. Check that the projector is in its intended picture mode and that its lens is clean.
Problem: The picture is blurry or cannot be made rectangular.
Solution: Move the projector to the recommended distance, level it, and aim it toward the screen center. Focus again after the projector is stable. Reduce keystone correction if possible, then reposition the projector to correct the shape physically.
Problem: The video plays but the sound is too quiet or out of sync.
Solution: Raise the source and speaker volume separately, move an external speaker closer to viewers, and test a wired audio connection if Bluetooth delay is noticeable. Check that the source is not muted and that audio output is set to the intended device.
What Success Looks Like
Your setup is ready when the projector displays a sharp, mostly rectangular image that fits the screen and remains visible from the planned seats in the expected darkness. The source plays without interruptions, audio is clear and synchronized, the power supply lasts for the planned session, and equipment and cables are protected from moisture and foot traffic.
Next Steps
After viewing, stop playback and shut down the projector using its normal power control. Let it complete any cooling cycle before disconnecting power, then bring the projector, source, speaker, and adapters indoors. Wipe the projector lens only with an appropriate soft cloth, pack cables without tight bends, and recharge batteries before storage. Note the successful screen size and projector distance so the next setup is quicker. If the image or sound was inadequate, change one factor at a time at the next test, such as screen size, location, or speaker placement.
Frequently Asked Questions
Can I use a portable projector outside during the day?
Usually, direct daylight makes a projected image difficult to see. Shade can help, but the clearest results generally come after sunset. Test in the same light conditions planned for viewing.
How far should the projector be from the screen?
The required distance varies by model and image size. Find the throw-distance range in the projector manual, measure from the lens to the screen, and adjust the position until the image fits.
Can I power the projector from its battery?
Only if the model has a built-in battery or supports an approved battery pack. Check its stated runtime and test the full setup; brightness settings and connected devices may affect operating time.
Do I need a special outdoor screen?
A dedicated screen can provide a smooth, matte surface and may be easier to secure. A suitable light-colored wall can work, but wrinkles, texture, and gloss can make the image uneven or reflective.
Can I leave the projector outside between uses?
Do not leave it outside unless the manufacturer specifically permits the conditions and the equipment is protected as directed. Many portable projectors are not weatherproof; bring the projector and power components indoors after use.


