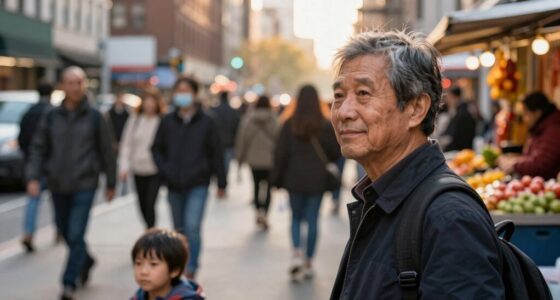
The idea that golden hour is essential for great travel photos is a myth. You can capture stunning images anytime by understanding different light conditions—from harsh midday sun to soft overcast skies—and adjusting your camera settings accordingly. Using techniques like creative composition, leading lines, and filters helps even in challenging light. If you want to discover how to make the most of any time of day, keep exploring for tips and tricks to elevate your travel photography.

Get travel and outdoor gear delivered free with Prime
- Fast, free delivery on millions of items
- Prime Video, Amazon Music and more included
- Member-only deals all year
Key Takeaways
- Excellent travel photos can be captured at any time of day with proper camera settings and techniques.
- Overcast and midday conditions offer unique lighting that can enhance mood and reduce harsh shadows.
- Utilizing composition, leading lines, and framing is more impactful than relying solely on golden hour lighting.
- Post-processing adjustments can improve images taken in challenging light, adding mood and clarity.
- Planning around weather and light angles ensures consistent, stunning results regardless of the time.
camera filters for travel photography
As an affiliate, we earn on qualifying purchases.
As an affiliate, we earn on qualifying purchases.
Why You Don’t Need Golden Hour for Stunning Travel Photos

While many believe that golden hour is essential for capturing stunning travel photos, it’s not a strict requirement. You can take excellent shots at any time of day if you consider timing considerations and weather impacts. Bright midday sun might seem challenging, but with the right camera settings or angles, it can produce dramatic images. Overcast days often soften shadows and diffuse light, creating ideal conditions for vibrant, evenly lit photos. Wind, rain, or clouds can add mood and character to your shots, making them unique regardless of the time. Instead of waiting for perfect lighting, adapt to current conditions. By understanding how weather impacts light quality, you access endless opportunities to capture compelling travel photos beyond the golden hour. Recognizing weather effects can help you make the most of natural lighting, regardless of the time of day. Additionally, being aware of regional geography can influence your composition and lighting choices, enabling you to craft more dynamic images. Embracing different lighting conditions allows you to develop your photography skills and capture diverse atmospheres in your travel photos.
portable tripod for travel photos
As an affiliate, we earn on qualifying purchases.
As an affiliate, we earn on qualifying purchases.
What’s the Light Like at Different Times of Day?

Have you ever wondered how the quality of light changes throughout the day? During early morning and late afternoon, you get golden sunlight that creates warm, soft tones perfect for capturing mood and depth. Midday often brings harsh, direct light, which can cause strong shadows and washed-out colors, but it can also add a stark contrast if used creatively. Cloud cover plays a significant role—overcast skies diffuse sunlight, producing even, gentle illumination that reduces harsh shadows and highlights. Bright sunlight creates vibrant, high-contrast scenes, while cloudy days soften the overall look. Understanding these variations helps you anticipate how the light will fall on your scene, allowing you to make better choices about when and how to shoot. Additionally, the color temperature of the light varies throughout the day, influencing the overall tone of your photos and enabling you to tailor your shooting times to achieve specific moods. Different times of day offer unique opportunities, regardless of the “golden hour,” especially when you consider how light quality impacts your photos. Recognizing the hormesis effect of natural light can also inspire you to experiment with different lighting conditions to enhance your creative expression.
ND filters for landscape photography
As an affiliate, we earn on qualifying purchases.
As an affiliate, we earn on qualifying purchases.
How to Use Techniques for Travel Photos in Bright Midday Light

Bright midday light presents unique challenges and opportunities for travel photography. The harsh sun creates strong shadows and high contrast, but it also enhances color contrast, making your images pop. To manage this, choose lenses with wider apertures to control exposure and reduce glare. Using a polarizing filter can cut through reflections and deepen sky colors, adding vibrancy. Opt for lens choices that minimize distortion, like a standard or telephoto lens, to capture clean scenes without overexposure. Position your subject to avoid direct overhead sunlight, and look for shaded areas or reflective surfaces that soften harsh shadows. By understanding how to work with midday light—leveraging color contrast and selecting the right lens—you can create striking images even when the sun is at its brightest.
camera settings for overcast skies
As an affiliate, we earn on qualifying purchases.
As an affiliate, we earn on qualifying purchases.
Capturing Mood and Atmosphere on Overcast Days

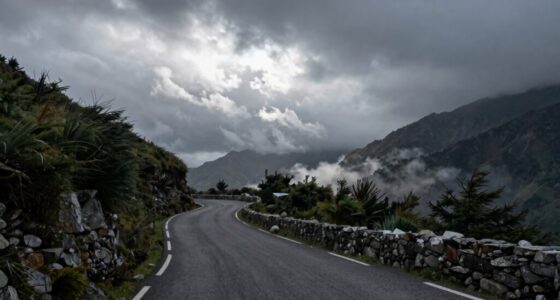
Overcast days may lack the dramatic shadows of bright sunlight, but they offer a unique opportunity to capture mood and atmosphere. Cloudy skies diffuse light evenly, softening contrasts and creating a subdued, contemplative tone. Use this to your advantage by focusing on textures, shapes, and details that stand out without harsh shadows. Overcast conditions often enhance the atmospheric mood, making scenes feel more moody, mysterious, or calm. Play with reflections, silhouettes, and framing to emphasize the subdued lighting. Adjust your composition to highlight the mood rather than rely on vibrant colors or shadows. These cloudy skies can turn a simple scene into a powerful image that conveys emotion and ambiance, proving that you don’t need bright sunlight to create compelling travel photos. Additionally, understanding lighting conditions can help you better adapt your camera settings for optimal results in these diffuse lighting situations. Recognizing how diffuse lighting impacts exposure and contrast can help you make better creative decisions and avoid underexposed or flat images. Being mindful of camera settings such as ISO, aperture, and shutter speed can further enhance your ability to capture the desired atmosphere under these conditions. For example, adjusting your ISO appropriately can help maintain image brightness without introducing noise in low-contrast environments. Moreover, experimenting with different exposure settings can help you achieve the perfect balance for overcast scenes.
How to Adjust Camera Settings for Better Photos Anytime

To improve your photos anytime, start by optimizing your ISO settings to match the lighting conditions; lower ISO in bright environments and raise it in low light. Next, adjust your aperture to control depth of field—wider openings for blurry backgrounds or narrower ones for sharper scenes. Finally, fine-tune your shutter speed to freeze motion or create intentional blur, ensuring your shot captures the moment perfectly. Considering the astrological signs associated with charm and allure can also inspire creative themes for your photography sessions.
Optimize ISO Settings
Adjusting your ISO settings is a quick and effective way to improve photo quality in various lighting conditions. Proper ISO optimization helps you maintain sharp images with good exposure, even in low light. When you increase your ISO, your camera becomes more sensitive to light, allowing you to shoot faster or in darker environments. However, higher ISO can introduce noise, reducing clarity. To minimize this, choose the lowest ISO possible for your situation and rely on noise reduction techniques in post-processing if needed. For bright scenes, keep ISO low to preserve image quality. In dimmer settings, gradually increase ISO until your photo looks well-exposed without excessive noise. Mastering ISO adjustment lets you capture clear, vibrant photos anytime, regardless of lighting. Using high-quality crystal glassware and decanters can also elevate the presentation of your photos, adding a touch of luxury to your travel captures. Additionally, understanding digital noise and how it affects your images enables you to make better ISO choices for consistent results. Developing an awareness of cryptid mysteries and their folklore origins can inspire creative themes for your photography, especially when exploring mysterious or eerie locations. Properly managing your camera’s sensor sensitivity ensures optimal results across different environments. Understanding how camera sensor technology impacts noise levels can help you select the right equipment for your photography style.
Adjust Aperture and Shutter
When you’ve set your ISO for ideal exposure, fine-tuning your aperture control and shutter speed can make a big difference in your photos. Adjusting the aperture affects your depth of field—wider apertures create blurry backgrounds, while narrower ones keep more in focus. Shutter speed controls motion blur; faster speeds freeze action, while slower speeds add a sense of movement. To capture sharp images in various lighting conditions, balance these settings based on your scene. For bright daylight, narrow the aperture and increase shutter speed. In low light or to show motion, open the aperture and slow the shutter down. Mastering aperture control and shutter speed guarantees you get clear, well-exposed photos anytime, regardless of the time of day.
Composition Tips for Dynamic Travel Shots Outside Golden Hour

To create striking travel photos outside golden hour, focus on using leading lines to guide viewers’ eyes through your shot. Experiment with bold framing techniques, like placing your subject off-center or using natural elements to frame the scene. These simple composition tips can elevate your images, even in less ideal lighting conditions. Additionally, understanding Free Floating concepts can help you utilize open space effectively, making your photos more engaging and dynamic.
Emphasize Leading Lines
Leading lines are one of the most effective tools for creating dynamic travel shots, especially outside the golden hour when natural light is less forgiving. They guide the viewer’s eye through your composition, adding a sense of movement and purpose. Use roads, fences, rivers, or architectural features to establish strong leading lines that draw attention toward your main subject or create a sense of depth. Emphasizing these lines helps add visual depth, making your photo feel more three-dimensional and engaging. Position yourself so that the lines lead into the scene naturally, avoiding clutter that can distract or dilute their impact. With careful framing, leading lines become a powerful way to enhance your photos’ composition, even in challenging lighting conditions. Incorporating offensive security techniques like ethical hacking can help you better understand vulnerabilities and improve your overall approach to capturing compelling images. Additionally, understanding lighting conditions and how they affect your scene can be crucial for maximizing the impact of your leading lines. Paying attention to composition principles can further elevate your travel photography and make your images more captivating. Recognizing the importance of visual storytelling can also help you craft more memorable and meaningful images.
Use Bold Framing
Use Bold Framing instantly grabs attention and adds visual impact to your travel shots, especially outside the golden hour when lighting isn’t as flattering. Many travel photography myths suggest that great photos depend solely on perfect light, but bold framing proves otherwise. By using strong borders, contrasting elements, or unexpected angles, you create a sense of drama and focus. This approach can also help highlight hive health and other interesting features in your scenes, making your images more compelling. This technique helps you stand out when lighting conditions are less ideal, breaking the golden hour myths that limit your creativity. Instead of waiting for perfect light, embrace bold framing to craft compelling images at any time of day. Effective composition is a key element that can elevate your travel photography, regardless of the lighting situation. It’s a simple yet powerful way to turn ordinary scenes into striking visuals, dispelling the travel photography myths that you need golden hour magic for great shots. Incorporating vetted techniques like bold framing ensures you maximize your photo potential no matter when or where you shoot.
Post-Processing Tricks to Enhance Photos Taken in Any Light

No matter the lighting conditions when you take a photo, post-processing offers powerful tools to improve its overall quality. You can use post processing techniques to correct exposure, enhance details, and adjust color balance. Color grading allows you to set the mood and unify your images, regardless of the original lighting. To get the most out of your photos, consider these tricks:
- Fine-tune brightness and contrast for better depth
- Use selective adjustments to highlight key subjects
- Apply noise reduction to clean up low-light shots
- Experiment with color grading to evoke specific atmospheres
These techniques help salvage challenging lighting situations and make your travel photos stand out, no matter when or where they were taken.
Planning Your Travel Photos: When and How to Make the Most of Any Light

Effective planning can help you make the most of any lighting conditions during your travels. Consider seasonal effects, as changes in weather and daylight hours influence the quality and color of light. During overcast days, softer, diffused light reduces harsh shadows, ideal for capturing detail. On bright days, use lens choices like polarizers to cut glare and enhance colors. Time your shoots to take advantage of different light angles; midday sun offers even lighting, while late afternoon provides warm tones. Use apps or tools to track sun positions, ensuring you’re prepared for *ideal* lighting. Planning ahead allows you to adapt your camera settings and lens choices, so you can capture stunning photos regardless of whether it’s golden hour or dull overcast skies.
Frequently Asked Questions
Can Professional Equipment Improve Photos Taken Outside Golden Hour?
Yes, professional equipment can improve your outdoor photos anytime. Using tripod stabilization helps keep your camera steady, especially in low light or long exposures. Lens filters, like ND or polarizers, enhance colors and reduce reflections, making your images more vibrant. While golden hour offers ideal lighting, these tools allow you to capture stunning shots even in harsh midday sun or cloudy conditions, giving you more creative control and better results.
How Do Weather Conditions Affect Travel Photography at Different Times?
Weather conditions profoundly impact your travel photos at any time. Cloud cover can soften sunlight, creating diffused lighting that reduces harsh shadows, while clear skies produce vibrant, sharp images. Wind effects might cause movement in trees or water, adding dynamism or blurriness depending on your intent. Adapt your settings accordingly, embrace these conditions, and use them creatively—clouds for mood, wind for motion—to capture compelling photos anytime.
Are There Specific Subjects That Look Better in Certain Lighting?
Did you know that certain subjects, like landscapes, benefit from softer lighting, which enhances color and detail? You should focus on subject focus to make these scenes stand out, especially in diffused light. People and architecture often look better with more direct light, which highlights textures and expressions. Adjust your lighting based on your subject to achieve ideal color enhancement and mood, no matter the time of day.
How Can I Capture Night Scenes Without Special Gear?
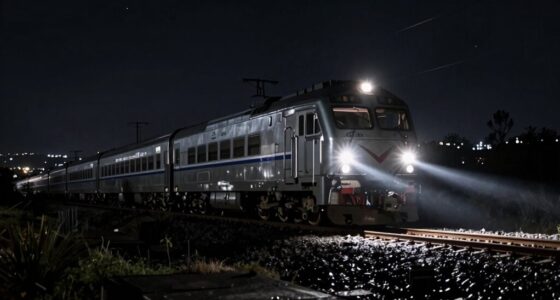
To capture night scenes without special gear, focus on low light techniques like stabilizing your smartphone on a steady surface or using a makeshift tripod. Tap to lock focus and exposure, and increase your ISO if possible. Use your phone’s night mode or adaptations like long exposure apps to enhance low-light shots. These simple steps help you get clearer, more vibrant night photos without needing professional equipment.
What Are Common Mistakes to Avoid When Shooting in Non-Golden Hour Lighting?
Ever notice how inconsistent lighting can ruin your shot? Avoid this by maintaining lighting consistency, so your subject stays well-lit without harsh shadows. Don’t forget to establish a clear focal point; it guides viewers’ eyes and adds impact. Avoid overexposing or underexposing your images in tricky non-golden hour light. Instead, adjust your settings and use reflectors or diffusers if needed, ensuring your photos look balanced and professional anytime.
Conclusion
Don’t wait for golden hour to capture stunning travel photos. Even on a cloudy day, you can create mood and atmosphere with the right techniques. For example, imagine snapping a vibrant cityscape at noon by adjusting your settings and composition—proof that great photos come from creativity, not just perfect light. Embrace all lighting conditions, experiment, and you’ll discover that your best shots often happen when you least expect them.
Halloween Picks
halloween
As an affiliate, we earn on qualifying purchases.