
Before leaving your rental car, thoroughly photograph the exterior for scratches, dents, and damage, making sure to capture all angles and any existing issues. Check the tires for uneven wear and proper pressure, and photograph the undercarriage if possible. Inside, take clear pictures of the seats, dashboard, and any pre-existing damage, including the VIN and license plates. Organize your photos systematically to protect against disputes—continue further to learn detailed tips on each step.
Key Takeaways
- Photograph all exterior surfaces, scratches, dents, and damages from multiple angles before leaving the rental site.
- Capture close-up images of tires, wheels, and undercarriage to document condition and any existing issues.
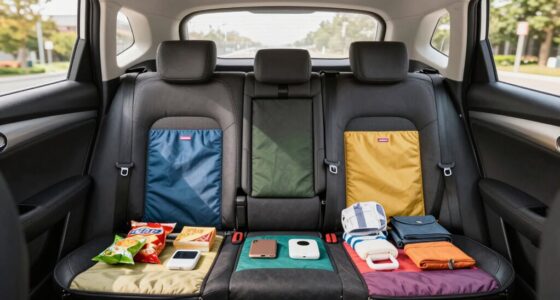
- Take clear photos of the interior, dashboard, seats, and controls to record interior wear and features.
- Record vehicle identification details like license plate and VIN with well-lit, focused images for verification.
- Organize and label all photos systematically, ensuring coverage of pre-existing damages to prevent disputes.
Why a Car Walkaround Before Returning Your Rental Matters

Performing a car walkaround before returning your rental is vital to make certain you’re not held responsible for pre-existing damage. This step helps you document the vehicle’s condition, protecting you from potential insurance claims later. When you review the rental agreement, it often specifies your responsibility for damages identified upon return, so thorough inspection is essential. By photographing scratches, dents, and other issues, you create evidence that can be presented if disputes arise. This damage documentation can significantly reduce the chances of unfair charges. Additionally, it helps clarify the vehicle’s condition, making the return process smoother. Conducting a thorough visual inspection allows you to identify any issues that might not be immediately obvious. Understanding the rental agreement terms can prevent surprises during the return process. Being familiar with the vehicle condition standards outlined in the rental policies can help you spot discrepancies more effectively. Familiarity with rental policies can also guide you on what constitutes normal wear and tear versus damage. Ultimately, a detailed walkaround safeguards your interests and keeps your rental experience hassle-free.
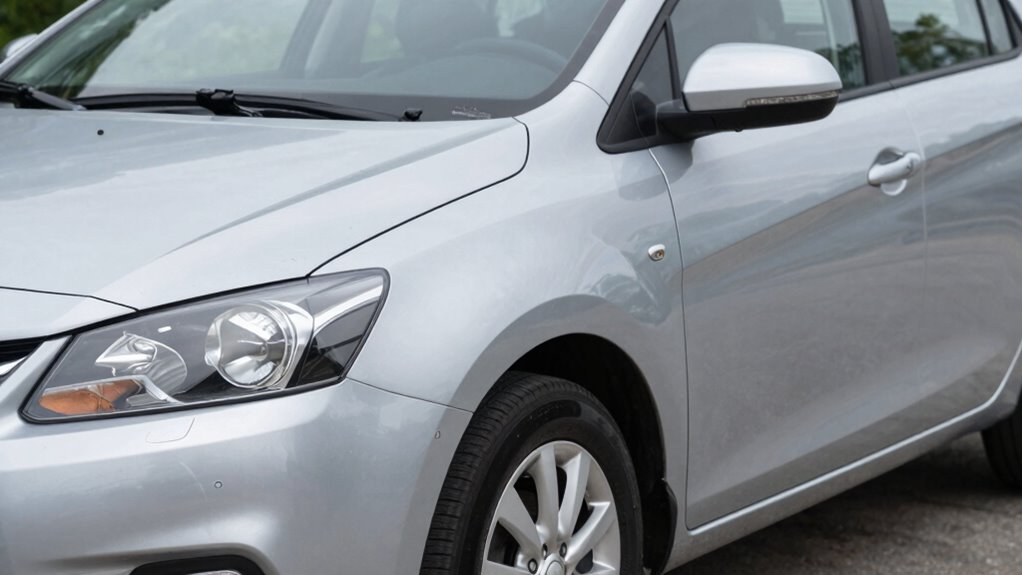
How to Check the Exterior for Dents, Scratches, and Damage

To effectively check the vehicle’s exterior for dents, scratches, and damage, start by thoroughly inspecting all visible surfaces, including the doors, hood, trunk, and bumpers. Perform a detailed exterior inspection, looking closely for any signs of new dents, scratches, or other damage. Use good lighting and step back to get a broad view of the entire vehicle. Take clear photographs of any existing damage to guarantee proper damage documentation. Be meticulous when noting the location, size, and nature of each mark. Remember, accurate damage documentation protects you from unfair charges later. Confirm that all damages are recorded before you leave, and keep your photos organized. This careful inspection helps ensure you’re not held responsible for pre-existing damage. Additionally, familiarize yourself with common damage types to better identify issues during your check. Recognizing typical signs of damage can aid in distinguishing between existing and new issues. Furthermore, understanding damage documentation best practices can help you provide clear evidence if disputes arise.
What to Look for When Inspecting Tires and Detecting Alignment Issues
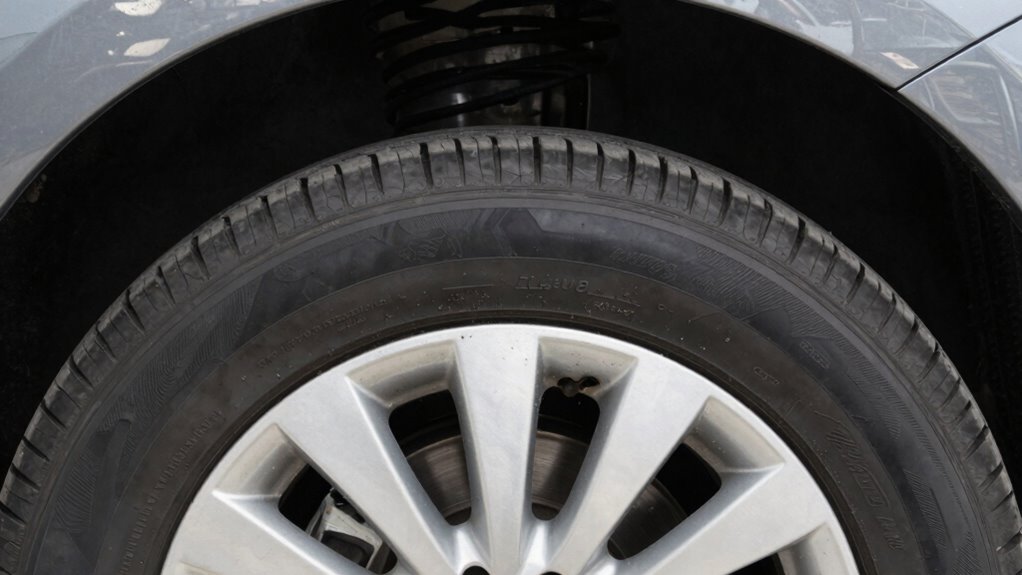
After inspecting the exterior for visible damage, it’s important to examine the tires thoroughly. Check the tire pressure to ensure it’s within the recommended range; underinflated or overinflated tires can cause uneven wear and affect safety. Look for uneven tread wear, which can indicate alignment issues. If the tires are worn unevenly on one side or have bald spots, it suggests poor alignment or suspension problems. Spin the tires to listen for any unusual noises or wobbling, which can also signal alignment issues. Make sure the sidewalls are free of cuts or bulges, as damage there can compromise safety. Properly aligned tires improve handling and extend their lifespan, so noting any irregularities helps ensure you’re responsible for returning the vehicle in good condition. Regularly checking tire maintenance can help detect issues early and prevent costly repairs. Additionally, verifying the condition of the wheel alignment during inspection can further ensure safe driving and prevent uneven tire wear. Being aware of alignment issues can also help in diagnosing underlying suspension problems that may affect vehicle performance. Paying attention to suspension health during inspection can provide early warning signs of broader mechanical issues that influence tire wear and handling.
How to Photograph the Interior, Seats, and Dashboard Clearly

Capturing clear photos of the interior, seats, and dashboard guarantees you have proof of their condition before returning the vehicle. Focus on the interior details, such as upholstery, seat cushions, and door panels, making certain each area is well-lit and in focus. Take photos from multiple angles to document any existing wear or damage. When photographing the dashboard, highlight key features like the instrument cluster, infotainment system, and controls. Ensure that all dashboard features are visible and unobstructed, especially any scratches or cracks. Use natural light or turn on interior lights to enhance clarity. Clear, detailed images of the interior help prevent disputes and serve as evidence if any issues arise during the vehicle’s return. Additionally, paying attention to vetted safety features can help you identify potential issues before returning the car. Checking vehicle condition reports can further ensure no damages are overlooked before returning the vehicle. Regularly reviewing damage documentation can also assist in maintaining a comprehensive record of the vehicle’s state throughout your rental period. Moreover, capturing detailed photos of wear and tear can aid in differentiating between pre-existing damage and new issues. Being thorough in your documentation can also streamline the return process by providing clear evidence of the car’s condition.
Why You Should Check and Photograph the Underbody and Undercarriage
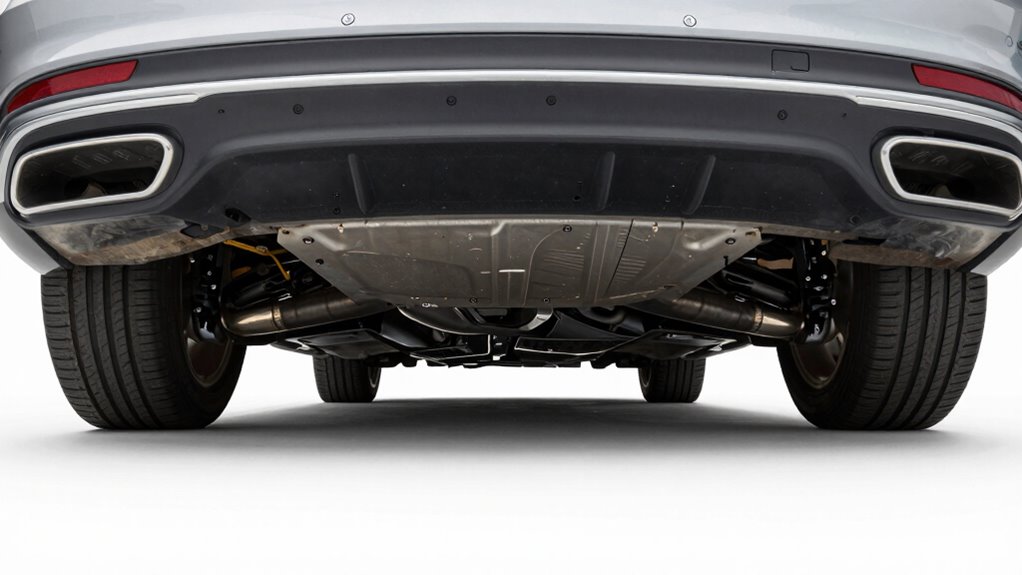
Checking and photographing the underbody and undercarriage is essential because it helps you document any existing damage or rust that might not be visible from the outside. An underbody inspection reveals scratches, dents, or leaks that could lead to disputes later. Taking clear undercarriage photos captures these details, providing proof of the car’s condition before your rental period. This documentation can also help identify potential issues caused by corrosive elements, which is important for assessing long-term wear. Additionally, inspecting the underbody can reveal hidden damage from previous accidents or neglect, ensuring you are aware of the vehicle’s true condition. Make sure your photos are well-lit and focused on key areas like the frame, exhaust system, and suspension components. Proper underbody inspection and thorough undercarriage photos give you peace of mind and a solid record to reference if needed, especially when considering long-term durability. Regularly checking for rust or damage can help prevent costly repairs down the line and maintain the vehicle’s integrity. Conducting this inspection also helps you recognize signs of prior repairs that might not be immediately apparent from the exterior.
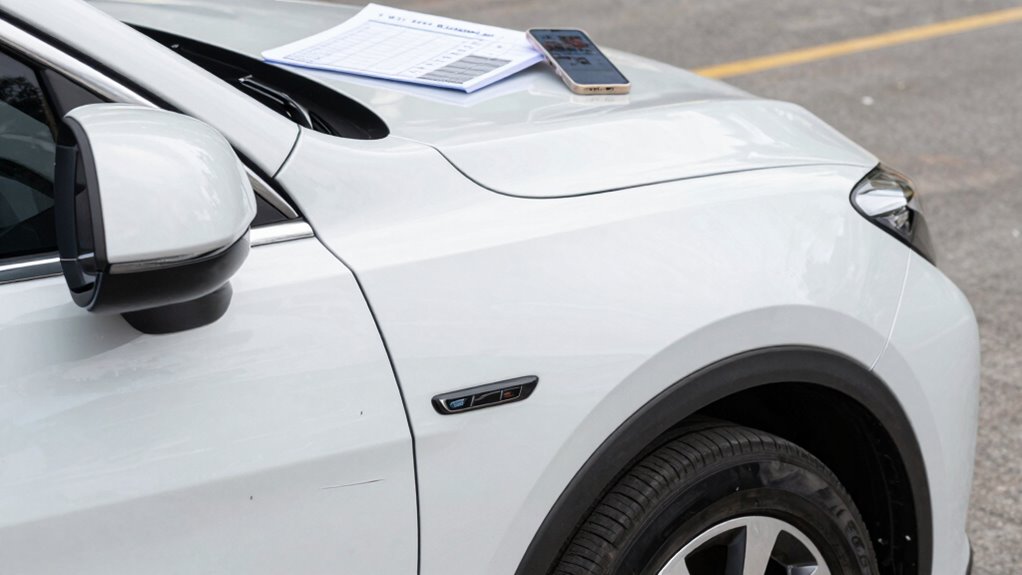
How to Capture License Plates and VIN for Accurate Records

Ever wondered how to guarantee your rental car records are accurate and complete? The key is capturing clear license plate photography and VIN documentation. Use your phone to photograph the license plate from different angles, ensuring the numbers and letters are legible. For the VIN, locate the dashboard or door frame, then photograph it directly—close enough to read every character. To keep your records organized, consider this chart:
| Item | Best Practice | Why It Matters |
|---|---|---|
| License Plate | Clear, focused shots from multiple angles | Prevents disputes or confusion |
| VIN Documentation | Close-up, well-lit photo | Ensures accurate vehicle identification |
| Additional Notes | Note any damages or discrepancies | Supports comprehensive documentation |
These steps help you avoid future issues and provide solid proof of the vehicle’s condition. Utilizing a text capitalization tool can ensure your documentation remains consistent and professional in appearance. Properly documenting these details aligns with accurate vehicle identification practices, which are essential for resolving any potential disputes. Moreover, taking detailed photos can assist in preventing misunderstandings if questions about the vehicle’s condition arise later. Additionally, using a surveillance app can help verify the time and location of your photographs for added proof. To further enhance your documentation process, consider keeping a photo timestamp feature enabled on your device to confirm when each shot was taken.
Tips for Using Light and Angles to Show Car Condition Clearly
To effectively showcase your rental car’s condition, pay close attention to lighting and angles. Use lighting techniques such as shooting in natural light or during overcast days to minimize harsh shadows and glare. Avoid direct sunlight, which can obscure details or create unwanted reflections. When selecting angles, choose positions that clearly display the vehicle’s panels, doors, and wheels without distortion. Low or eye-level shots work well for capturing surface scratches or dents, while straight-on images highlight symmetry and alignment. Consistently photographing from the same angles ensures uniformity, making it easier to compare photos later. Proper lighting and thoughtful angle selection help produce clear, detailed images that accurately document your rental car’s condition. Additionally, understanding the importance of visual documentation can significantly improve your ability to protect yourself from unwarranted charges. Being aware of seasonal lighting conditions can also help you plan the best times to photograph your vehicle for optimal visibility. Paying attention to camera settings can further enhance the clarity and detail of your photos. Incorporating lighting conditions into your planning can lead to more consistent and professional-looking results.
How to Organize and Store Your Walkaround Photos Effectively
Organizing and storing your walkaround photos systematically guarantees you can quickly access and review them when needed. Effective photo management guarantees you have clear evidence of the car’s condition, reducing disputes. Use a dedicated folder or cloud storage to keep images safe and accessible. Label each photo with details like date, location, and specific damage. Consider creating subfolders for different rental periods or vehicle types for easier navigation. Regularly backup your images to prevent loss. Maintain a consistent naming convention to avoid confusion. This diligent storage organization gives you peace of mind and quick retrieval, especially if issues arise later. When your photos are well-organized, you’ll feel confident knowing your evidence is secure and ready to support your claims.
Common Mistakes During Your Inspection and How to Protect Yourself

Many people make mistakes during their rental car inspection that can lead to disputes or charges later on. One common error is failing to photograph every angle of existing damage, which can complicate insurance claims or rental policy disputes. Additionally, not reviewing the rental agreement carefully may cause you to overlook coverage details or fees. To protect yourself, always document damages thoroughly and ask for clarification on rental policies.
| Mistake | How to Protect Yourself |
|---|---|
| Skipping detailed photos | Take clear photos of all sides before leaving |
| Ignoring existing damage | Report and photograph pre-existing damage upfront |
| Overlooking rental policies | Read and understand the terms to avoid unexpected charges |
| Forgetting to check insurance claims | Confirm coverage options and document damages properly |
Frequently Asked Questions
How Detailed Should My Photos Be for Rental Car Documentation?
You should take clear, high-quality photos that show all angles of the car, including interior and exterior, to document any existing damage. Aim for a good quantity of photos—cover every side, close-ups of scratches, dents, and the tires. Make sure your photo quality is sharp and well-lit to avoid any disputes later. The more detailed your photos, the better you’ll protect yourself during the return process.
Can I Use My Smartphone Camera for the Walkaround Inspection?
Think of your smartphone camera as a vigilant eye, capturing every detail of your rental car’s condition. Yes, you can use it for your inspection techniques; just guarantee your shots are clear, well-lit, and focus on scratches, dents, and tire tread. Use steady hands and multiple angles to create an exhaustive record. Your smartphone photography becomes a digital shield, protecting you from potential disputes later on.
What Specific Angles Highlight Damage or Wear Effectively?
You should photograph damage assessment and wear patterns from multiple angles to capture all details. Take close-up shots of dents, scratches, or cracks, and shoot from the front, rear, and sides to show their extent. For wear patterns, focus on tires, seats, and the interior, capturing both close-ups and wider shots. This approach makes sure you document the vehicle’s condition thoroughly, helping to avoid disputes later.
How Long Should I Spend Inspecting and Photographing the Vehicle?
You should spend about 10-15 minutes on the inspection duration to guarantee thoroughness. For example, imagine you’re inspecting a rental car after a long trip; taking this time allows you to capture high-quality photos of scratches, dents, and tire condition from multiple angles. Prioritize clarity to avoid disputes later. Rushing can lead to missed damage, so allocate enough time to document everything accurately and maintain good photo quality.
Are There Recommended Apps or Tools to Organize My Rental Car Photos?
You should try apps like Google Photos, Apple Photos, or Dropbox for photo organization. These apps automatically sort your images, making it easy to find your rental car photos later. For app recommendations, consider using Evernote or Notion to add notes or details about each photo. Using these tools helps you keep everything organized, ensuring you’re prepared with clear, timestamped images if any issues arise during or after your rental.
Conclusion
Just like a diligent scribe documenting a noble steed before returning it to its stable, your thorough walkaround ensures you leave no mark unseen. By capturing clear photos and inspecting every detail, you safeguard yourself from unwarranted charges—protecting your journey from unexpected shadows. Remember, in the end, your careful record-keeping is your shield, much like a modern-day knight’s armor, guaranteeing your story ends with integrity and peace of mind.